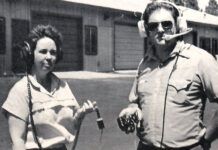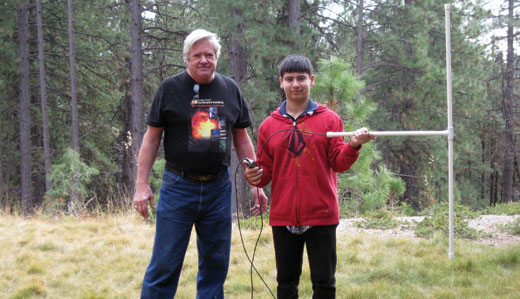
The author and James in the antenna test range.
Some months it takes real juice to drag the muse out and write my column. Other months it just falls into my lap, and writing it is pure fun.
The subject of this column is the most fun I’ve had in a long time. Not from a technical point of view, but from the personal gratification of showing a young man that A) electronics is not powdered bat wings and black magic, and B) a classroom can be as fun as you want it to be.
I have a good student in my fabrication class named Paul. One day after class I stopped in the school office on my way home and there he was, along with a woman who evidently knew him, and a 50%-scale model of Paul named James, who looked to be about 13.
We got to chatting and, as usual, the subject turned to aviation. James lit up like a Christmas tree. He had just been to Oshkosh to attend the Air Academy and was totally hooked on the world of flying. Paul and I later exchanged emails, and I found out James had recently been given an aviation band scanner as a gift, but it didn’t pick up many signals. Let’s see…small scanner, rubber duckie antenna, inside the house with (most likely) foil-backed insulation in the walls. It’s no wonder it wasn’t working well.
So a couple of weeks later, I gave James a Christmas present of three pieces of half-inch PVC water pipe, one 4-foot length of 3⁄8-inch wood dowel, two 24-inch pieces of Romex house wire, a few half-inch PVC fittings and an RF connector. A rather strange gift for a 13-year-old?
Not really. The deal was that over the winter semester break, James, Paul and I would venture into my classroom and assemble these bits and pieces into a weatherproof outdoor scanner antenna.
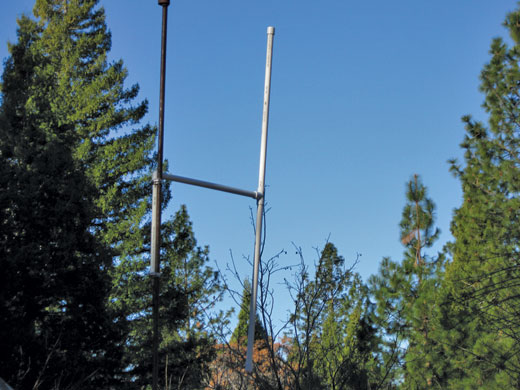
The antenna securely clamped to a steel antenna mast. The clamps were obtained from the “aviation department” at a local True Value store.
It worked. We took it outside and heard airplanes talking wherever we turned the dial: Oakland Center, Norcal Approach and a few towers. (Then again, we were at the Nevada County campus of Sierra College, which is on top of a 3000-foot “tower” called the Sierra Nevada foothills. According to Google Earth, the exact spot we were standing on is 2851 MSL.)
Want to make one? It’s easy and costs about $5, plus the connector(s) and about an hour and a half of time. You’ll have a watertight, lightweight and strong antenna for your efforts.
I’ve made one modification since the prototype we built for James, and here it is: Instead of the balun pipe coming straight out to the connector, I put an “L” in the pipe for easier fastening onto a vertical mounting pipe.
Required Materials
Start by collecting the following parts for an aviation band antenna:
- 6 feet of half-inch PVC schedule 40 water pipe (either one 6-foot section or three 2-foot sections).
- Five half-inch PVC “slip” fittings; three caps, one T fitting and one L fitting, plus pipe glue to put them on.
- One 4-foot length of 3/8-inch wood dowel.
- 24 inches of electrical house wire, with or without ground (#14 or #12 will both work fine).
- 6 feet of 50-ohm coaxial cable (RG-174 is easier to work with, but RG-58 is stronger).
- One RF connector to mount on the antenna, plus enough 50-ohm cable and connectors to go from the antenna to the radio. I prefer to use BNC connectors for RG-174, but the F connectors at RadioShack will work fine with RG-58.
- Clear silicone bathtub or kitchen sealant (RTV or one of its derivatives).
- Two radiator hose worm clamps to fit around both the PVC slip fitting and the vertical pipe you will mount the antenna to.
- One cable-tie to fit around the wood dowel plus the coax.
- Three small cable ties to fit around the coax cable doubled back over itself.
- 4 inches of fairly small (#20 or so) flexible insulated wire. I use copper braid (solder-wick) with sleeving, but any reasonably flexible wire will work.
Getting Started
Pick a frequency in the middle of the band that you want to cover. To cover the whole air band—118 to 137 MHz—you would pick 127.5 MHz as the center frequency. If you wanted to optimize the antenna for the tower, ground control and Unicom frequencies, you’d probably pick something like 123.0 MHz. We chose 123.0 to optimize the lower part of the band.
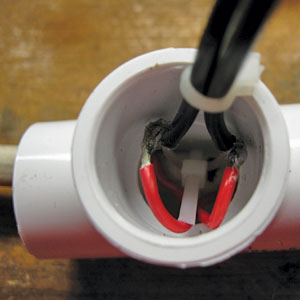
The top end of the balun at the PVC T. The red wires are the 2-inch insulated ear wires connected to the copper antenna connection point. Note the tie-wrap in the center of the T holding the coax to the dowel.
Strip the house wire, and then strip both the white and black wires so that you have two 24-inch bare copper wires. Cut both of the wires 21 inches long for
123.0 MHz and 20 inches long for 127.0 MHz. A good general formula to use is: Length = (2800/f) – 2 inches, in which f is the frequency you want for band center in MHz, and 2 inches is cut off for the length of the balun ears.
Mark the exact center of the dowel. Drill four 0.085- to 0.095-inch (3⁄32-inch) diameter holes in the dowel. Drill two of them 1 inch from either side of the center and two of them 16 inches from either side of the center. Drill them all symmetrically and on the same side of the dowel.
Insert one #14 house wire into one of the 1-inch off-center holes with a half inch of wire showing on one side and the much longer length of wire on the other side of the dowel. Bend the short half-inch section of wire toward the center of the dowel and the other end toward the end of the dowel. Squeeze this wire with pliers so that the bend is reasonably sharp on both sides. Now, insert the long end of this wire through the 16-inch off-center hole and bend it up away from center (toward the end of the dowel) so that the wire is reasonably taut against the dowel; squeeze this bend with pliers, too. Repeat this operation with the other wire through the other holes, making sure that the little short legs of both wires (the ones near the center of the dowel) are on the same side of the dowel.
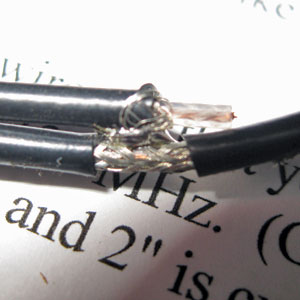
The braid-to-braid connection at the lower end of the balun.
Manufacture the balun (rhymes with Alan, see drawing). Bend the coax into a “V” shape, with one leg of the V 17 inches long. The other leg should be approximately 65 inches long (in some cases, I will note that exact length is not critical). Strip the black outer sheath from the center of the V for half an inch on both sides of center (a hobby knife is the best tool for this). Cut the woven braid shield in the center of the V and then, using a pointed tool (an ice pick works well), unweave the braid shield and twist the unwoven shielding into two “ears” sticking out to the sides of the coax. Make absolutely sure that there are no fine wires connecting these two ears, and then solder (or “tin”) the ear wires together so that they cannot unravel.
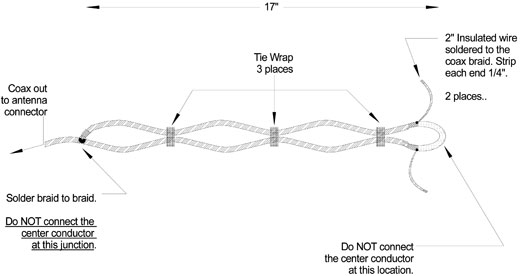
The drawing for the coaxial balun.
Cut the #20 flexible wire in half, strip it about half an inch on both ends, and solder one end of each wire to the braid, making a much longer ear on both sections of braid. Strip the short, loose end of the coax back about a quarter inch. Bend the braid back over the top of the outer sheath, exposing about an eighth of an inch of the center insulator and conductor. Make sure that the center conductor is not touching anything at this end of the coax, and then put a small amount of sealant onto the end of the center conductor to keep moisture from entering the coax.
Measuring from the center of the V, put a tie-wrap (or loosely tied twine) holding these two legs of the V every 5 inches or so. Again, be absolutely certain that the two ears are not touching each other at the apex of the V. Mark on the long section of coax exactly where the braid of the end of the short section of coax touches. Remove the outer plastic sheath at the mark and solder the two braids together. The center conductor of the coax is not attached at this end of the coax. Put a dab of silicone seal near the ears, and let it dry so that the ears cannot touch after the sealant dries.
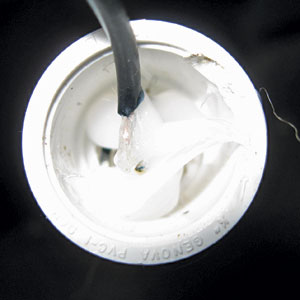
The antenna connector end of the assembly. Note the silicone sealant to keep vibration from affecting the solder connections.
Run the dowel through the PVC T so that the center of the dowel is near the center of the T. Put the balun into the center hole in the T and fish the #20 wires through the two holes in the T, with one wire running out of each hole. Solder one #20 wire onto the short leg of the copper antenna element wire on the dowel. Similarly, solder the other ear wire onto the other antenna element.
Tie-wrap the center of the balun (center of the V) to the center of the dowel. It will be necessary to fish the tie-wrap around both the balun and the dowel. For the last time, inspect the center of the balun V to make sure that the ears aren’t touching, and then “pot” the center of the balun and the dowel with sealant so that no amount of rough handling of the antenna will let these two ears touch. Be generous with the sealant, and let it set up solid, preferably overnight.
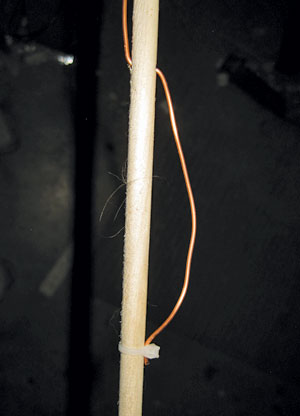
The “spring” at the end of the antenna element keeps the dowel from vibrating inside the PVC pipe.
Cut three pieces of water pipe 24 inches long. These are the element and the balun pipes, respectively.
Measure the distance from the T to the end of the balun, giving it an extra 2 inches for good measure, and then cut one of the PVC pipes to this length and insert the balun into the pipe. Pipe glue the pipe into the T and let it dry.
Temporarily insert one 24-inch section of pipe over one leg of the antenna elements. Measure and cut so that there is about ¼ inch of pipe longer than the end of the dowel. This ensures that if the potting ever lets go, the most the dowel can move is ¼ inch before hitting the end cap. Remove the pipe from the T and form the loose end of the antenna wire into a gentle curve so that some force is required to reinsert the pipe into the T. This keeps the antenna element from bouncing around with rough handling. Pipe-glue the pipe into the T and put an end cap onto the open end of the pipe. Repeat with the other end of the antenna. Except for the open end of the balun pipe, you now have a hermetically sealed antenna.
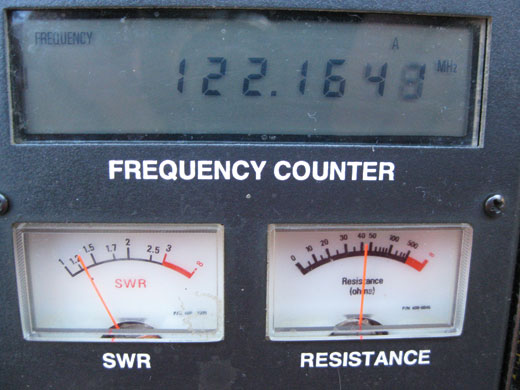
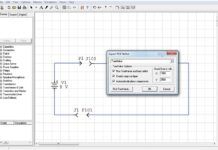
An antenna “goodness” meter. Goodness is measured on the SWR meter on the left side; the best is a reading as low as possible. This antenna has its best performance with a 1.2:1 SWR at 122.16 MHz, just a bit below the design goal of 123.0 MHz. This represents an error of approximately a quarter inch in the antenna element length.
Glue the cutoff end of the balun pipe into the L. This is going to be a vertical antenna, so thread the coax into the open end of the L and then pipe-glue the L to the balun pipe, keeping the mounting pipe as nearly parallel to the antenna pipe as possible. The coax will be dangling out the end of the mounting pipe.
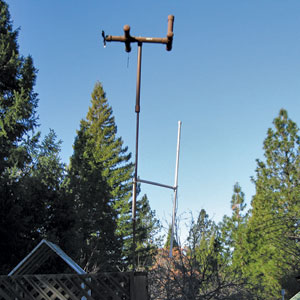
The steel antenna mast was originally used to mount Backyard II, the aviation design wind indicator (see KITPLANES®, August 2010).
Drill the remaining end cap to accept your chosen RF connector. For the BNC connector, drill the end cap 3/8-inch diameter and 0.1 inch off-center to accommodate the accompanying solder lug. Cut the coax about 3 inches longer than the pipe, strip the last 1 inch and solder the coax to the connector, the center conductor to the connector center conductor and the coax braid to the solder lug. Pot the connector-coax so that there is no chance of the braid ever touching the center conductor. For the F connector, drill the end cap in the center at the appropriate diameter and mount the F connector in the hole.
Pipe-glue the end cap onto the mounting mast, and you now have a hermetically sealed, waterproof antenna.
In the coming months, I’ll have a lighting deal for you, a really great way of marking your wires and a whole bunch of other good stuff. Stay tuned.


