The airlines have a nickname for the fine folks who do what I do for a living—they call us sparkies. I guess that’s because when we inadvertently work on a hot circuit, sometimes a loose wire finds its way to the airframe and starts a little spark event in the vicinity.
But sparks in the hangar and sparks in the air are two very different animals. In the hangar we simply turn off the master switch and keep on working. In the air we don’t have that luxury and those sparks just play havoc with our navs and coms.
Greek Magic
But how do we generate sparks in the air? Simply by moving a conductor (like a wing) through an insulator (like air) at some moderate speed (like flying). Yep, the Greeks proved it beyond a doubt some 3000 years ago. Move an insulator (like a hunk of cat fur) over a conductor (like a rod of amber) and you wind up with little tiny bursts of lightning that you can see in a dark room. To them, it was the magic of calling Hephaestus (the Greek god of fire) out of the cat fur. To us, we just call it static electricity. (To me, it is still magic to get that sort of reaction from cat fur and amber.)
But it plays hob with the radios. We need to somehow appease the spirit of Hephaestus and ask him to quietly leave our airframe without a light show or unwanted sparks. One of the ways of doing this is by taking the energy created by moving the airframe through the air and dissipating it as heat instead of lightning and sparks. The good thing is that the energy created is a high voltage at a terrifically miniscule current, so the actual power we have to get rid of (high voltage times super-low current) is very tiny.
The best way I know of to convert electrical power to heat is by passing it through a resistor. Watt told us a long time ago that passing current through a resistor will generate power as the square of the current. (P = I2R). The problem that presents itself, then, is to coax that voltage and current through a resistor, rather than jumping off the airframe as a little lightning bolt.
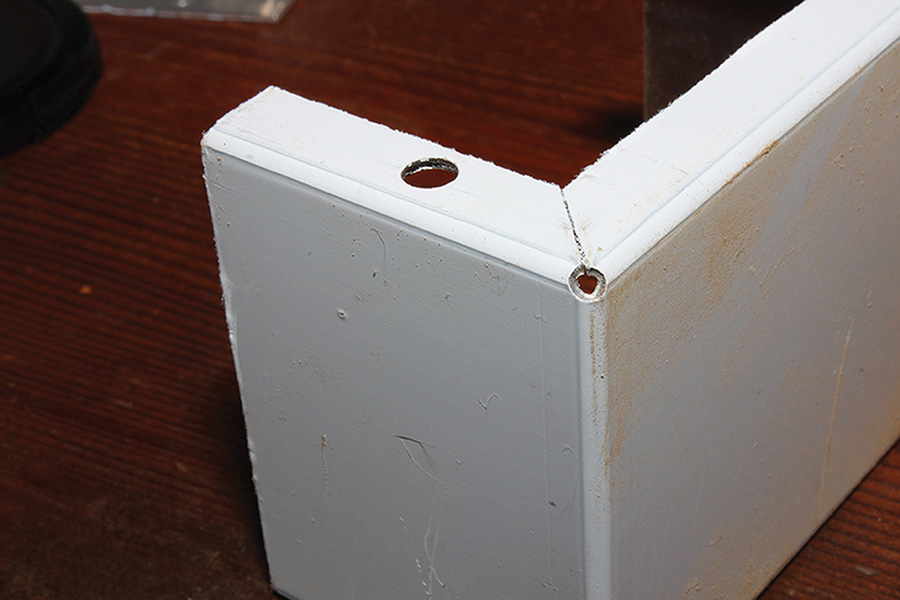
A relief hole drilled in a corner of an aluminum bracket relieves mechanical stress concentrated at the point—a fine point can relieve the “tension” electrons feel when moving through your airframe.
Stress Relief—Get the Point
Let me delve into the world of metalwork to give you an analogy to what I’m about to present. Most of us tin-benders know that when we have a sharp corner to make in the metal, we should drill a small hole in the center of the corner to relieve stress. We actually call them stress relief holes and they serve to spread the metal’s tendency to concentrate any tension or pressure in the metal at a sharp point. By drilling that hole, we spread the stress/tension/pressure over the entire circumference of the hole, rather than at the sharp point, and thus keep the metal from eventually cracking at that point.
In languages other than English, we find electrical voltage uses words like “tensión” (Spanish) and “tensione” (Italian) to indicate that what we think of as voltage is actually a tension, or a stress, on the electrons in the metal. It logically follows, then, that this “electron stress” will concentrate itself at a sharp point; say, for example, at the trailing edge of the wing, or at the point of a wingtip, or on the sharp edge of an elevator or a rudder.
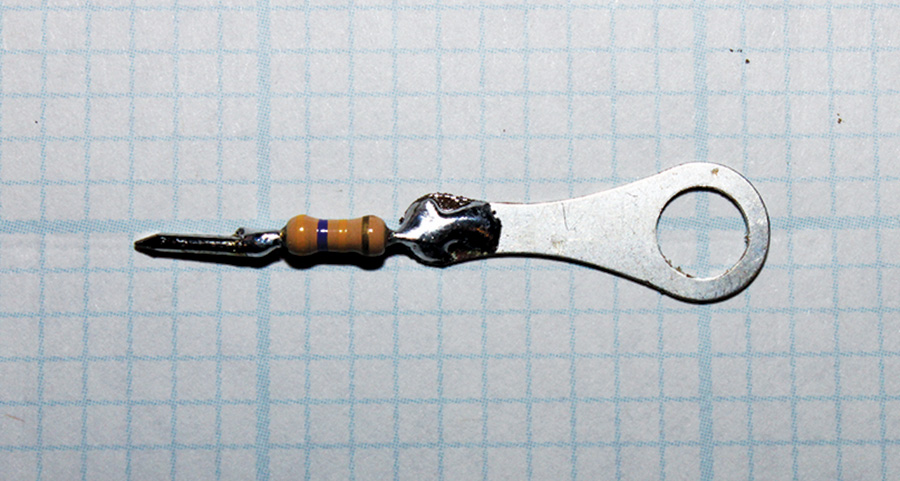
Our job, then, is to provide a sharp point for the electrons to get to, but only after giving up the vast majority of their “tension,” so they don’t have the energy to create a spark. Let’s see, what we need is some way of showing the stressed electrons a sharp point, but forcing them through a resistor to get there. Some might call that a static wick, and some might charge upwards of $50 for a magic stick like that to suck the lightning out of the electrons on the “heavy iron” transport category aircraft.
Would you settle for a nickel? Yep, for half a dime we can make static wicks that will perform every bit as good as those little things you see in the catalogs that go two for a Franklin bill.
I’m kidding, right? Who in their right mind would pay that kind of money for something that costs less than a stick of gum to make yourself? It’s a question you may well ask yourself.
Way back in the dark ages, a young fellow who had dark hair at the time wrote a piece for KITPLANES® about such a device but, without much field testing to optimize the design. Herewith I present to you the results and the optimized design after nearly two decades of field testing on half a dozen aircraft at Nevada County Intentional Peapatch (KGOO, if you must).
Resistance is Not futile
Coaxing static electricity to pass through a resistor to a sharp point is a compromise, as is all of aviation (and electronics as well). If you make the resistor too high a value, the electrons just see it as too much of a problem to get to the point and will try and find a better way (like off the sharp edge of your aileron). If you make the resistor too low of a value, the electrons won’t lose enough energy and will be more than happy to create little lightning bolts off of the sharp point you provide.
After a lot of experimentation and such, we’ve found that a value between 100 kilohms (100kΩ) and 1MΩ is optimum, and it is very noncritical which limit you take. I personally believe that about 470kΩ (a very common value) is about the best, but you can use whatever you see fit between these limits.
But what do we use for a sharp point? Hmmm…”Hey, Cyndi, got a junk needle in your sewing basket?” A cut-off needle or straight pin will work just fine. So will the sharp point cut off of a thumbtack.
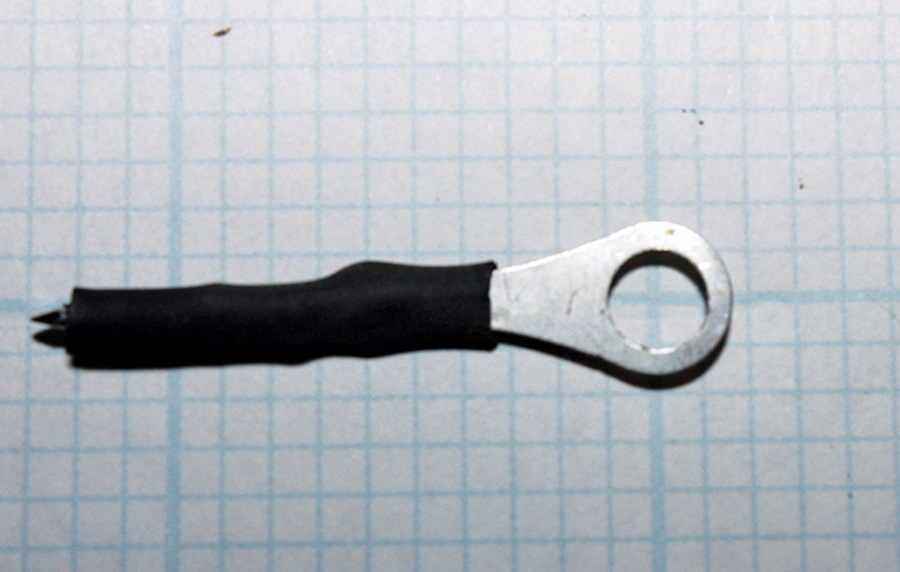
And to attach it to the aircraft? How about a plain old solder lug under a mounting screw of some sort? How to keep it warm and cozy inside and keep rain and washing detergent from getting to the innards? Shrink sleeving!
Put it all together and you’ve got roughly a nickel’s worth of parts to make a $50 static wick.
Bonded
But not so fast. There is a gotcha that has to go along with the static wick, and that is that every piece of metal in the aircraft has to be bonded to every other piece. If, for example, you’ve got a metal thimble or a metal push-pull tube that has a microscopic gap where it fastens to a control surface, all the static wicks in the world on that control surface aren’t going to do you any good if that fastened joint with the gap allows an arc to form in that gap.
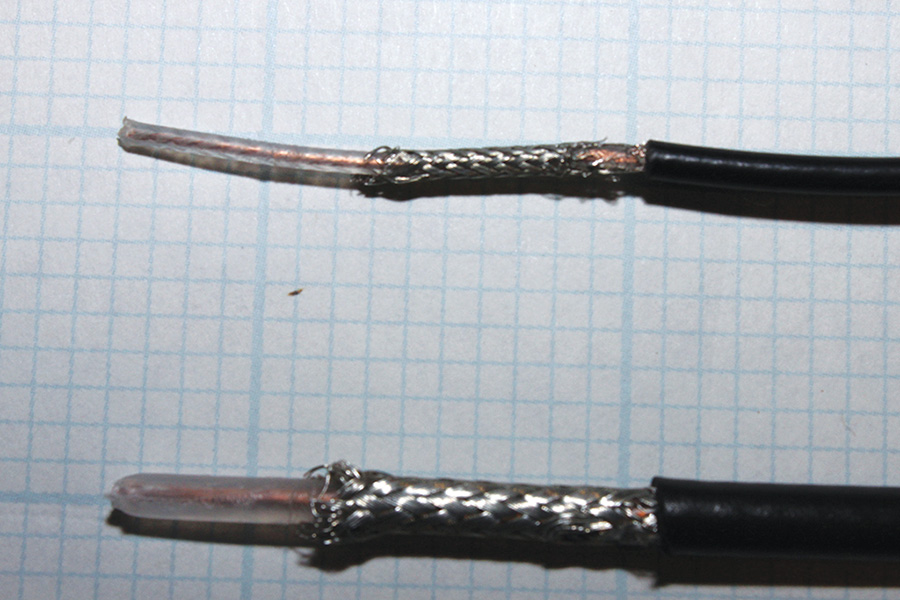
RG 174 (top) and RG 58 (bottom) coax showing (right to left) the plastic outer jacket, the flexible braid, and the center conductor with polyethylene insulation.
So, first bonding and then static wicks once the bonding process has taken place. And what do we use for bonding? Flexible copper braid. Which costs the Good Lord’s fortune I suppose? Nope. Two sources. One is to buy it as “desoldering wick” from the usual culprits (Mouser, DigiKey, etc.) and even good old Radio Shack sells the stuff in five-foot lengths for $5. Or if you want to go cheaper, buy some coaxial cable (comes in lots of sizes and cheap), strip off the outer plastic sheath and use the shield as braid. It even comes pre-tinned for soldering. (See The FAA Maintenance Bible [i.e., AC 43-13-1B] Chapter 11 for some really good info on bonding.)
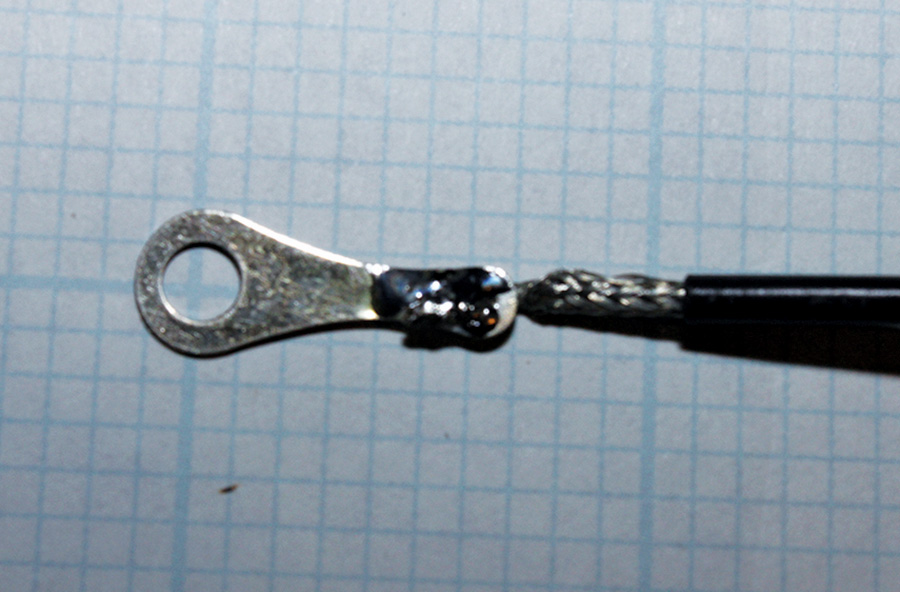
One end of a bonding strap using the “whole cable” method of construction. The braid is the carrier of the electricity, but the center conductor and the outer plastic jacket are left in place to provide a more robust mechanical assembly.
Want the coax cable bond wire to last a very long time? Use the braid to conduct the electricity, but keep the outer plastic sheath and center conductor intact to provide mechanical strength. It increases the life of the bonding wire several times over. For those of you operating in sub-zero temperatures, the cable is very prone to having the outer plastic jacket crack when very cold. You may wish to invest in Teflon cable for these applications.
One caveat. The static wicks will last forever. The bonding straps will flex each time you move the attached surface and one day will crack and break. Just take a good look at them during the condition inspection, and if you see them start to fray, simply toss the worn strap out and replace it. Again, with cheap coax braid, each strap is about a nickel’s worth. You can increase the life of the strap tenfold if you use good old shrink sleeving over the braid where it attaches to the solder lug (or other terminal).
Happy sparking, and stay tuned.
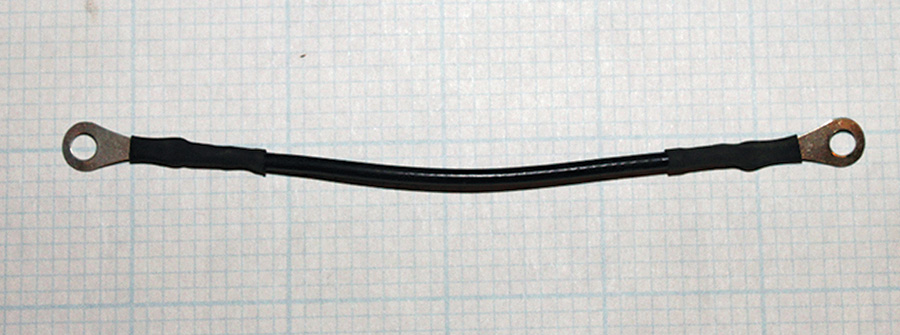
A five-inch bonding strap using the whole cable method of construction. This method will multiply the life of the bonding strap many times over.

![]()
Jim Weir is the chief avioniker at RST Engineering. He answers avionics questions in the Maintenance Bay forum at www.pilotsofamerica.com. His wife, Cyndi Weir, was his high school sweetheart 50 years ago and now she keeps Jim from making stupid blunders in spelling and grammar. Check out www.rst-engr.com/kitplanes for previous articles and supplements.


