
The author test-fits a fuel line to the gascolator on his Sportsman with a Lycoming O-360 engine. Proper firesleeve installation is not yet complete in this photo.
Fuel systems for most Experimental/Amateur-Built airplanes are fairly simple, but fuel problems account for a fair share of Experimental airplane accidents, especially on first flights and during the Phase I flight-test period (25 or 40 hours). Perhaps the simplicity of the systems engenders a casual attitude, or maybe some builders can’t resist the urge to “improve” things. Even though our focus is firewall forward, a broader look at fuel systems seems appropriate, especially in light of the recent NTSB report on Experimental/Amateur-Built aircraft. (See a complete analysis of this report by Ron Wanttaja).
Good fuel systems are simple fuel systems. Some bad fuel systems are also simple, but no good fuel systems are complex, at least not on the types of airplanes we are concerned with here. Complexity and reliability seldom go hand in hand. Here are a few good general rules:
• Keep the number of fittings and bends to a minimum. In this case, less is more.
• Remember that water will seek the low points of any fuel system, and it must be eliminated wherever it collects. Low points in fuel tanks and fuel lines must have drains. For planes that can be built as trigears or taildraggers, builders need to consider that taildragger versions may have low points in the fuel system that trigears do not.
• Vent lines should have no low points other than the fuel tank and the outlet for the vent line. No other low points are permitted, ever.
• Your fuel system should be controlled with one, and only one, fuel valve. It can be a right/left/ both/off valve, but there should never be more than one. The only exception would be if you needed to install ferry tanks for a very long flight.
• Size your fuel lines so that you can get 150% of maximum fuel flow even at a 15˚ angle of attack (up or down). If you need a fuel pump to achieve that, then you need a backup or boost pump in case your primary pump fails.
Fuel Lines
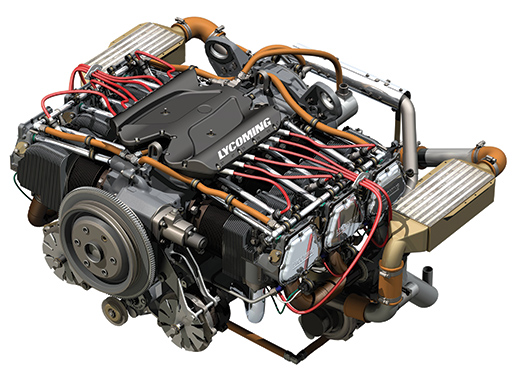
Fuel lines for four-cylinder Lycoming engine installations are pretty much standardized at 3/8-inch diameter. The IO-390 engine needs just about the full capacity of a 3/8-inch fuel line. Larger powerplants may require half-inch diameter fuel lines, at least for gravity-fed systems.

A Sportsman builder installs a fuel drain at a low point in the fuel system. Note the cushioned Adel clamps supporting the fuel line.
Most airplane fuel lines are made of 3/8-inch aluminum tubing, the most popular being 5052-0 tubing with a wall thickness of 0.035 inch. It is light and strong and makes for a professional-looking installation. It is easily fabricated with standard tubing tools, but it does not hand-bend easily, except for small angle bends. However, a tube bender works well with 5052 tubing to produce bends up to 180˚. The softer 3003-0 aluminum tubing can also be used, but it will typically not produce as nice an installation. Its main advantage is that it is much easier to bend, and it is also less expensive. The problem with the 3003 tubing is not that it is hard to bend, but that it is hard to straighten. So making neat, straight runs is difficult.

To make a good connection between the aluminum tubing and the push-on hose, it is best to make a bead in the tubing with a beading tool, as shown at the bottom of the photo. This prevents the hose from slipping off the tubing.
Aluminum tube fittings are standard AN items, readily available from aircraft supply stores. You will need an aircraft flaring tool to use these fittings. Please note that automotive flaring tools will not work with AN fittings because they flare to 45˚, versus the 37˚ required for aviation applications. Swagelok fittings provide an alternative to the flared AN fittings, and they work well. Their advantages are that they are easy to work with and require no flares. Their downsides are that they are more expensive and a bit heavier than AN fittings. They are available from McMaster-Carr and other industrial supply retailers. All aluminum fuel lines should be secured with cushioned Adel clamps.

Aluminum fuel lines can be easily fabricated with these tools: (left to right) tubing bender, tubing cutter and aviation flaring tool.
All fuel lines need to be protected from heat and fire as much as possible. Any fuel line forward of the firewall should be covered with Aeroquip Firesleeve or its equivalent. This is mainly to protect it from fire but also to reduce the likelihood of vapor lock in the fuel lines. Fuel-line penetrations through the firewall should be made with steel bulkhead fittings.
Be sure to route fuel lines as far away from exhaust pipes and mufflers as possible, with an absolute minimum clearance of 1½ inches. Secure them with cushioned Adel clamps just as you would oil lines, and don’t forget to allow some slack for engine movement. For 3/8-inch lines, the maximum recommended unsupported length is 16 inches.
Fuel systems typically run at low pressures, so it is less troubling to use push-on hoses and barbed fittings for fuel lines than it is to use them for oil lines. Less troubling is not the same as best practice. If you decide to go with these low-cost hoses and fittings, you still need to protect them with Aeroquip Firesleeve.
Flexible fuel lines can be made using Aeroquip or similar hoses. In the article on oil lines in the November issue of KITPLANES®, we covered this process, which is the same for oil or fuel lines, the only difference being that the firesleeve protection is required for fuel lines, but optional for oil lines. All fuel and oil lines should be carefully cleaned out after assembly.

All fuel lines should be cleaned out before use. Here a gun-cleaning patch is pulled through a completed hose with some safety wire. Clean fuel lines contribute to a safe first flight.
Fuel Pumps
For builders of high-wing airplanes with carbureted engines, the standard engine-driven fuel pump, putting out 4-6 psi, is just fine. In fact, with smaller engines, you may decide to eliminate the fuel pump completely. Such a system will not need an auxiliary pump. However, for a low-wing airplane, an engine-driven pump and an auxiliary pump will be required. If the engine uses a carburetor, then the standard engine-driven pump, teamed with a low-pressure auxiliary pump, will provide for all of your fuel-pumping needs. If you have fuel injection, your fuel-pump requirements will be dictated by the fuel-injection system chosen.

This assembly, consisting of a boost pump, fuel filter and a pressure-relief valve, is standard for fuel-injected engines. This is in addition to the engine-driven fuel pump.
It is important to be sure that your auxiliary fuel pump is the type that flows freely when it is shut off. Some pumps do and some don’t. Facet, a popular manufacturer of fuel pumps for Experimental aircraft, makes both kinds, so be sure about which one you have. For example, Van’s recommends the Facet model 40108 fuel pump for the RV-series airplanes, all of which are low wing. This pump has 3/8-inch (-6) flare fittings and allows for the free flow of fuel though the pump when it is off. The Facet model 40109 fuel pump has a check valve in it that shuts off fuel flow when the pump is not running. This feature is ideal for a transfer pump that moves fuel from an auxiliary tank to the main tank, such as is seen with GlaStars and the Sportsman, but it would be a disaster for a backup to the engine-driven fuel pump. If you insist on using a fuel pump that will not flow freely when off, you will need to provide a bypass line with a check valve in it to allow fuel to flow through the system in the event of a pump failure.

Andair makes a simplified boost pump and fuel-filter assembly with internal-pressure regulation. Their system, which is suitable for use with most fuel-injection systems, saves weight and complexity.
Fuel Injection
There are three basic types of fuel injection available for homebuilders: mechanical-port systems like those made by Precision Airmotive and Airflow Performance, electronic-port fuel injection such we see on the new Rotax 912 iS and the Aerosance system found on some newer Continentals and a few Experimental Lycomings, and throttle-body systems by companies such as Rotec and Ellison. The mechanical-port system is by far the most common.

This Velocity builder has adapted his vertical-intake engine to work with a horizontal-intake fuel-injection servo. A K&N filter bolts right up to the flange on the front of the servo, making for a simple installation.
For fuel-injected engines, the auxiliary fuel-pump situation is determined by the fuel-injection system. These systems run at much higher pressure and require completely different pumps—ones that you cannot buy for $50 or less. Fuel injection such as the Precision Airmotive (Bendix) system found on most Lycoming engines requires an engine-driven pump that puts out about 25 psi or more and an electric auxiliary pump with similar pressure output. The auxiliary pump and related filter cost about $800, not counting the rest of the fuel-injection system.
In addition to the certified fuel-injection systems that Precision Airmotive makes and supports, they make an Experimental-only system under the brand name of Silver Hawk EX. It is a mechanical system much like the certified system, but it is tailored and priced for the amateur builder. There are other good mechanical fuel-injection systems available for Experimentals, for example the Airflow Performance system, but the Silver Hawk EX system is the most common.

A typical 3/8-inch fuel line with an AN819 sleeve and AN818 nut, shown with an AN816 nipple.
Fuel injection offers one distinct advantage over a carburetor, which is the ability to closely control the fuel flow to each cylinder and thereby achieve greater fuel efficiency. Carburetors are simple and effective, but they rely on the intake system to distribute the fuel-air mixture from a central point. This works, but it produces an uneven distribution of fuel that can vary with the position of the throttle. Thus one cylinder can be leaned to the optimum fuel-air ratio, but the other cylinders are left to fall where they may. With some fiddling, a reasonable compromise can usually be reached, but it is common for exhaust-gas temperatures (EGTs) to vary by 100˚ or more with a carbureted engine. That means that some cylinders are running efficiently, but others are wasting gasoline by running too rich. It is common to see wasted fuel flow on the order of 1 gallon per hour or more when using a carburetor.
Not to be overlooked is the need for fuel injection if you intend to fly upside down or perform negative-G maneuvers in your airplane. Carburetors do not run well upside down, making many aerobatic stunts impossible to perform without fuel injection and, of course, fuel pickups that also work inverted.
Gascolators, Filters and Valves

The Andair gascolator works well for Experimental airplanes. An extension is often needed for the fuel drain, as seen here. The AN816 fitting in the top is for the line to the primer.
The gascolator serves as the last-chance fuel strainer and drain before gasoline goes to the engine-driven fuel pump and then on to the carburetor or fuel-injection system. It should be mounted low on the engine side of the firewall in most airplanes. A drain needs to extend from the gascolator out of the bottom of the fuselage to allow easy access during preflight. The Andair gascolator sets the standard in the industry for these units, but there are also numerous other suitable alternatives available from the usual aviation-supply sources. The Andair unit is available with -6 male fittings, which will save you the trouble of installing two AN816 nipples. Most of the other units come with ¼-inch NPT pipe threads.
While the gascolator functions as a fuel filter with its fuel-strainer screen, many airplane builders like the added security of a separate automotive-type inline fuel filter. With fuel injection, a special filter will be required, which is usually installed in conjunction with the high-pressure boost pump. In most cases, it is better to install the fuel filter inside the cabin, away from the heat of the engine compartment and away from any possible engine fire. Be sure to secure it well, and put it someplace where it can be accessed for easy maintenance.
Fuel Valves
The fuel system should have a single valve that is easily accessible to the pilot in flight. This seems so basic as to not need stating, but a number of accidents have resulted from placing the fuel valve where it is difficult to reach. Extra fuel valves, accessible or not, can also cause confusion and should be avoided. The point is that a single, easily accessible fuel valve is what you want.

Shown here is a simple on/off fuel valve and an Andair right/left/off fuel valve. The on/off valve is set up to use Swagelok fittings, but the Andair valve uses standard AN fittings.
The simplest fuel valve is the single on/off valve. This shuts off all fuel flow to the engine but allows fuel to be drawn from wherever it is available. Some people prefer to be able to balance fuel from side to side and elect to use a right/left/both/off valve. These valves are nice, if somewhat more expensive. Andair has a whole family of fuel valves that offer just about every possible combination, including simultaneously switching feed and return lines for fuel-injection systems.
Primers
Pilots in moderate climates may never use a primer to start their planes, but the correct way to start a cold engine is to prime it first, and those who live where winter snows are common will especially appreciate this. Manual priming applies only to engines with carburetors, of course, as a fuel-injection system can perform the priming chores without extra equipment. Primers can be either manual or electric.
The old Essex primer is a familiar sight to any Cessna pilot and works well on Experimentals. ACS also makes a manual pump primer that is a bit less expensive. Many builders who want to avoid bringing another fuel line into the cabin use an electric pump for the priming chores. Either way gets the job done. Typically primer nozzles (AN4022-1) get installed into the heads of cylinders 1, 2 and 4 (on four-cylinder engines). The nicest primer systems are made up of stainless steel lines, but 1/8-inch aluminum tubing will also work. Just be sure that the line from the pump to the engine is flexible.

A sniffle valve (shown in center of the photo, looking at the bottom of the engine) is required for any engine with a horizontal-intake system to prevent fuel from pooling in the intake tract.
Sniffle Valve
A fuel-injected engine with a horizontal (forward- or rear-facing) intake should be equipped with a sniffle valve to allow excess fuel that can pool in the intake system to escape. A sniffle valve is a simple check valve located at the bottom of the engine. A line runs from the valve to a safe place to allow excess fuel to be dumped overboard. The engine will run without this valve, but excess fuel retained in the intake system can make the engine hard to start and can ignite in the case of a backfire. No need to expose yourself to these potential problems for want of a simple, inexpensive valve.
FADEC
Full Authority Digital Engine Control (FADEC) is not quite ready for prime time for most Experimental airplane builders. Such systems promise single-lever engine control for the pilot, with electronically controlled management of fuel injection, ignition and propeller in one unit. Aerosance (TCM) sold a few FADEC systems to Experimental builders but no longer offers them for Lycoming engines. Its energies have been focused on refining the system for TCM-powered Cirrus airplanes. Lycoming has a FADEC system on its new TEO-540 engine for the Lancair Evolution, but that technology has not been applied to smaller engines yet. Precision Airmotive has a system that manages fuel injection and ignition but not the propeller. Others are working on systems, and this is an area ripe for further development.
Lycoming has a complete FADEC system that they developed for their new TEO-540 engine. This technology will eventually make its way to their smaller engines.
Fuel-Flow Tests
Once your fuel system is complete, it is time to test it and make sure it works well. It is worth noting that a fuel-system test has been a requirement for Experimental airplane builders for a long time (see AC 90-89A).

Lifting the airplane into a 15˚-nose-up position needs lots of hands to keep it safe. An engine hoist provides the lifting power, but a number of helpers keep it steady and place supports under the mainwheels.
The ultimate test is to check the flow of the actual system in the airplane. Fuel flow should be checked by putting a minimal amount of fuel in the main tanks, say 2 gallons per tank, removing the fuel line from the inlet to the carburetor or fuel-injection servo, and checking how much fuel flows out of the line in 1 minute. From that number, a flow rate per hour can be calculated. The formula to use: Multiply the ounces of fuel drained in 1 minute by 60 to find ounces per hour. Then divide by 128 to get gallons per hour (or just multiply your ounces in 1 minute by 0.47). That number should be 1.5 times the full-power fuel flow of your engine.
Your engine manufacturer’s literature can tell you the full-power fuel flow of each engine, but a quick estimate can be made by taking the rated horsepower and dividing that number by 12. The result is in gph. So a 180-horsepower O-360 engine will use about 15 gph at maximum power. The fuel system feeding that engine needs to be able to deliver 1.5 times that, or 22.5 gph minimum. Using this number, you should drain at least 48 ounces of gasoline in 1 minute in your fuel test. This is the number for a high-wing airplane with a carburetor, where gravity provides the fuel pressure or is the secondary source of pressure, if the engine-driven pump fails. If you have a low-wing airplane or any airplane with fuel injection, you can use 1.25 for your safety factor instead of 1.5, but you will need a primary and a backup fuel pump to be sure you always have fuel pressure.

A 6-foot stepladder under the tailwheel was a little short of 15˚ nose up, but we called it close enough. Two helpers steadied the tail during the test, just to be safe. Fuel flow was great in all configurations.
If you are building a high-wing airplane, the fuel-flow test should be run with the engine off and fuel flowing freely through an inactive pump. If the airplane is a low-wing design, use only the auxiliary fuel pump to achieve the required flow. On takeoff and landing, the auxiliary fuel pump must be on to guarantee adequate fuel flow in these critical situations.
To be sure the airplane will have fuel flow in all attitudes, it should be tested with the airplane in the level, 15˚-nose-up and 15˚-nose-down positions. In each configuration, you should measure fuel flow and unusable fuel. This means three separate tests. Otherwise, you may get surprised by how much fuel flow and/or how much unusable fuel you have in various attitudes. For example, the original GlaStar had to add header tanks to deal with the problem of excessive unusable fuel in the nose-down attitude, which was only discovered when someone ran the engine out of fuel on a long descent.

Cub co-builder Ed Zaleski runs fuel into a 2-quart measuring cup during the 1-minute fuel-flow test. Forty ounces of fuel in 1 minute was more than enough to safely feed the Cub’s 120-hp engine.
Enter the results of the fuel-flow test in your builder’s log. Your Designated Airworthiness Representative (DAR) may ask you about this before signing your airplane off and issuing an airworthiness certificate. In any case, you’ll want it for yourself.
Installing and testing your fuel system so that it will reliably and safely provide fuel to your engine is one of the most important things you will do while building your airplane, so give this important task the attention it deserves. Next time we will look at exhaust systems.
![The week ahead: a KC-135 tanker passes over the grounds at EAA AirVenture Oshkosh, where Phillips 66 will set up at tents #430 and #431. [Credit: USDA Forest Service]](https://www.kitplanes.com/wp-content/uploads/2026/07/Screenshot-2026-07-22-at-10.01.04-AM.jpg?w=218&h=150&crop=1 "Phillips 66 Sets Course for Oshkosh With Specials, Seminars—and Popsicles")


It was stated that the fuel system should have only one fuel valve yet, each tank must have a valve which can isolate this tank when necessary for maintenance. Which is it? In my case , I have an Gyroplane with a main and two saddle tanks. Each tank has a valve to isolate each but they all flow into a mainline whereas a valve which is reachable by the pilot can halt the flow from all three. All of the tanks are able to cross-feed via the main fuel line when allowed to flow.
I am not a fan of having a valve at each tank for maintenance. If such valves are installed they should be safety wired in the open position and they should be easily accessible for preflight inspection to be sure they are open. No plane that I have built or inspected has more than one fuel valve.
Thanks for the article, Dave!
I saw a GlaStar with 2 separate on/off valves in the console, side by side. Left and Right. Having seen many others with the Andair, I thought this was a simple and elegant solution. Simple is always better, right? It offers the same settings – Both, Left, Right, Off. I can see your point though with a single valve. In this case the definition of ‘simple’ may have different perspectives.
Not having built mine, I was truly educated about the nose up / nose down flow test. I acquired my early build GlaStar and found it had no header tanks. While it’s been in the hangar dressing other issues I was fortunate enough to find some factory ones on the Glasair users group. Until I install them I’m exploring other types of header tanks. Interesting to know why they were created. I thought it was for the lack of fuel when banking. Always learning!
Comments are closed.